WSL2+LXD: Let's have some Fun too
Introduction
During the Q&A of the first WSLConf, the Corsair took over for a last demo on LXD.
The setup was already done, so in this blog post we will check the setup and then we will reproduce the demo: create a new custom distro from a LXD container.
Now it’s time for you to have Fun too.
Prerequisites
By now, for the ones who read the blog, you should know the drill.
Here are the prerequisites to follow this blog post:
-
OS: Windows 10 Insider Slow - the version used is 19042
-
- In order to install the distros as WSL2 by default, once WSL2 installed, run the command
wsl.exe --set-default-version 2in Powershell
- In order to install the distros as WSL2 by default, once WSL2 installed, run the command
-
WSL2 Ubuntu distro installed from the Windows Store - the distro used is Ubuntu-18.04
-
[Optional] Microsoft Terminal installed from the Windows Store
- Open the Windows store and type “Terminal” in the search, it will be (normally) the first option
LXD: getting started
Before we can start playing with LXD, we need to start it and run through the initial setup.
And, luckily for us, the Store distros already have LXD builtin, so we can stay in “vanilla” environment.
Enough theory, let’s jump into our Shell:
# Run the LXD init setup > we should get an errorsudo lxd init# Start the LXD servicesudo service lxd start# [Optional] start the service when the distro startssudo update-rc.d lxd enable# Check if the LXD network interface already exists > needed for the init setupifconfig lxdbr0# Run again the LXD init setupsudo lxd init# Keep all the default values except for the nework if it already exists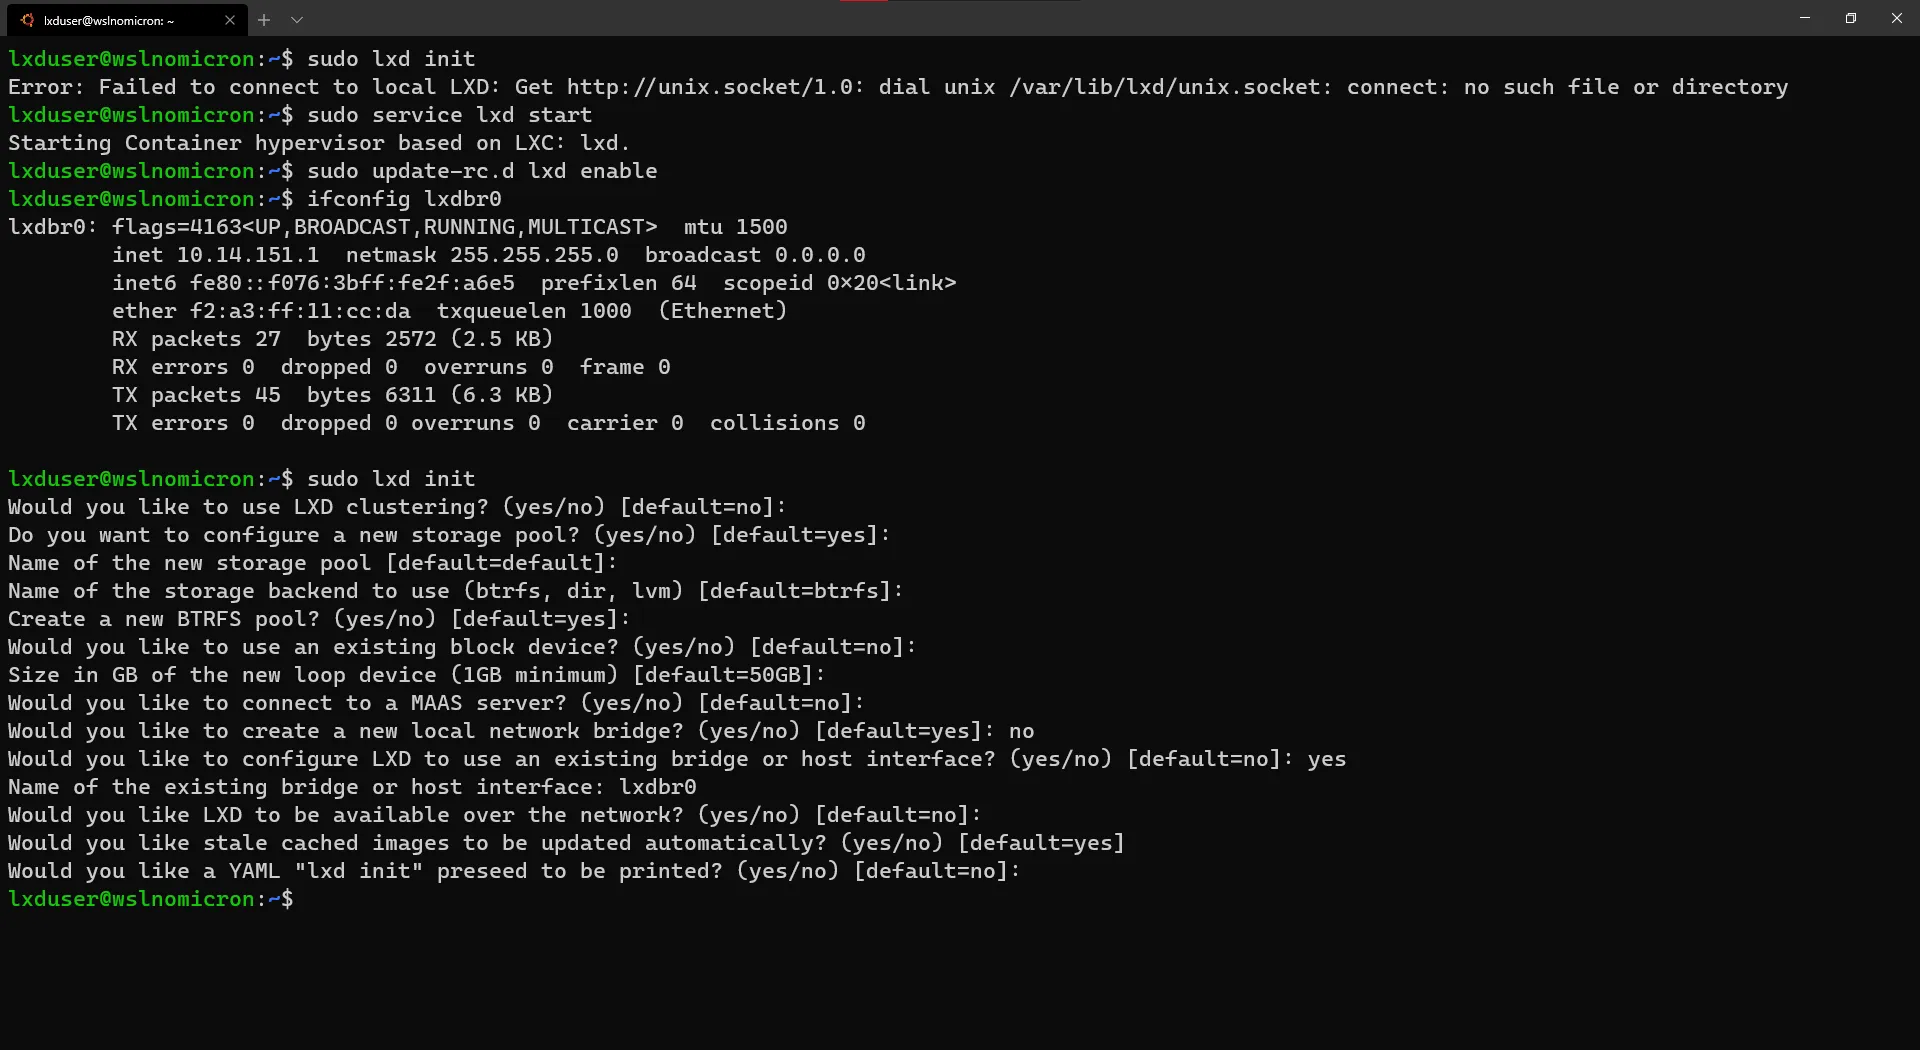
Once everything has been setup, let’s try to connect to our newly LXD service:
# List all created containers > this will result with an errorlxc list# List all created containers with sudosudo lxc list# To avoid using sudo all the time, let's add our user to the lxd groupsudo usermod -aG lxd $USER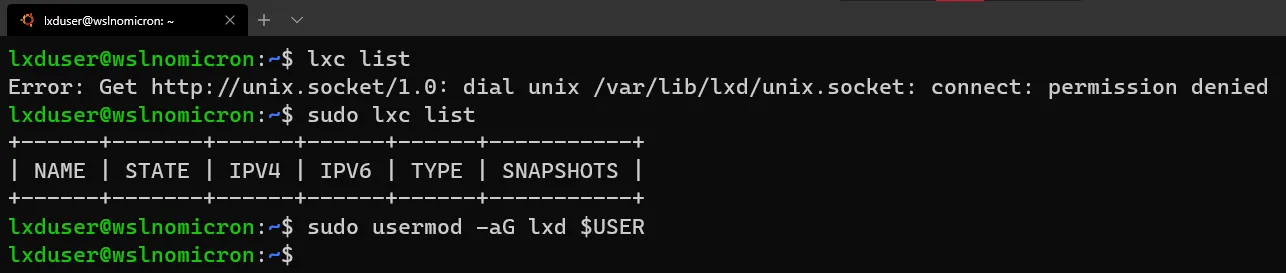
Exit the current session and open a new one:
# List all created containerslxc list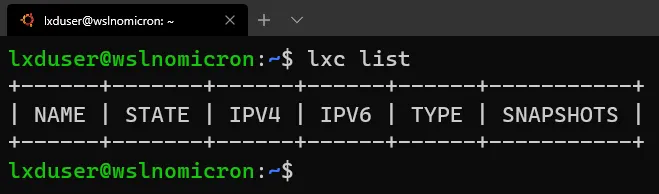
We are now ready to move to the next stage and create our first container.
LXC: containers without Docker
We can finally start and the goal is simple: create a container, configure it “WSL2 way” and import it as a new distro.
This will allow us to pre-configure the distro, so once we import it, we can start working with right away.
Another (important?) point is, at least for me who likes to test new WSL2 distros, we can automate several steps that are repetitive between distros (user creation, wsl.conf file, etc…).
Ok, we’re ready so let’s dive in:
# List the images available for Funtoo distrolxc image list images:funtoo# Create a new container based on the Funtoo distrolxc launch images:funtoo/1.3# Check if the container has been correctly createdlxc list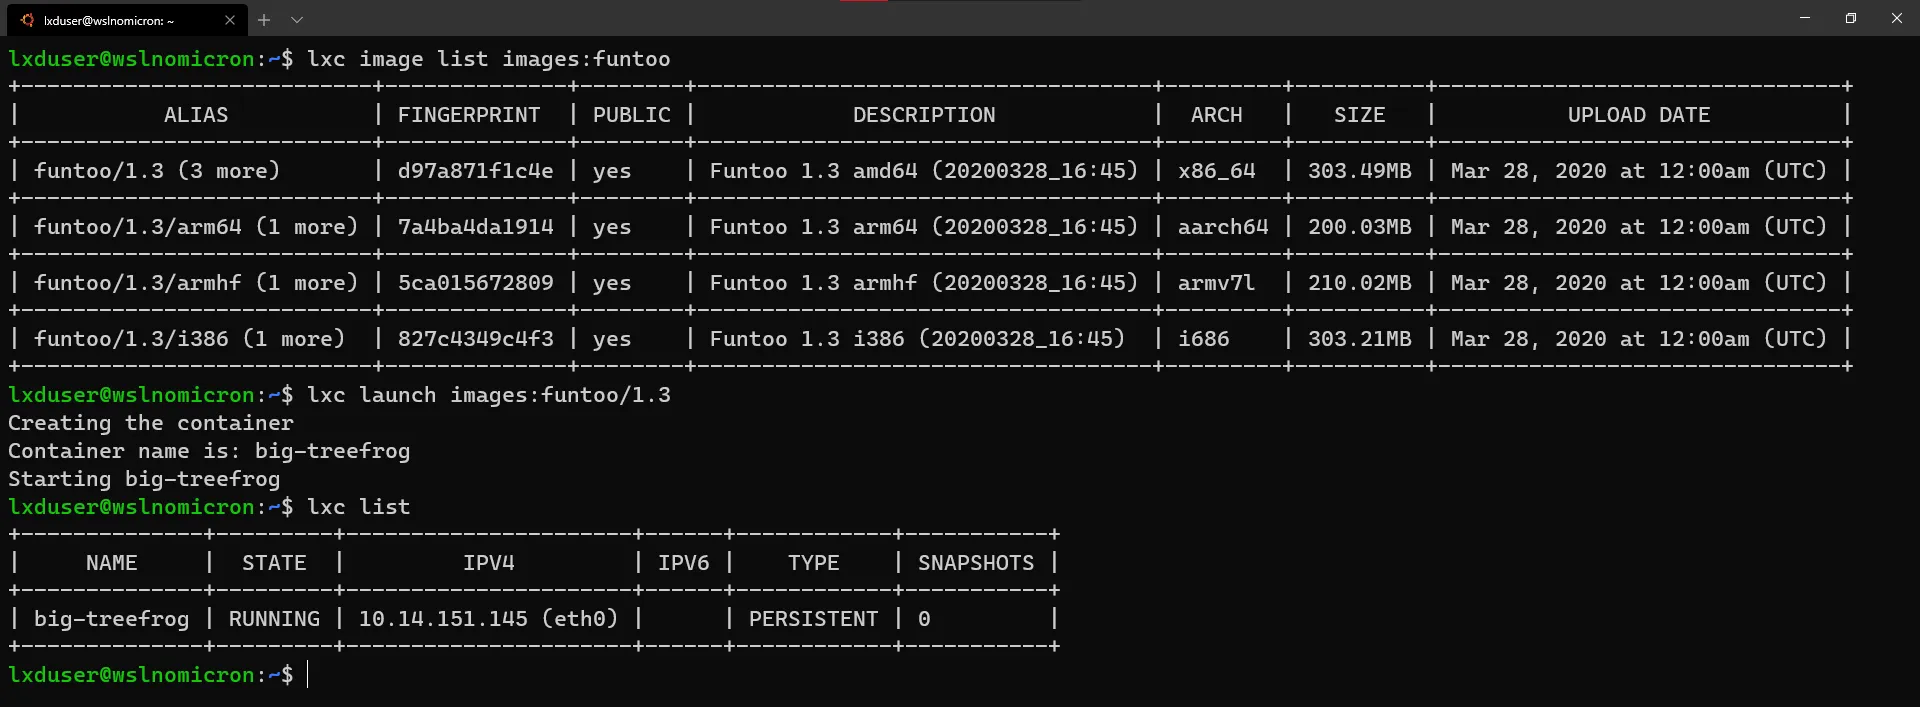
Tip: while we took the Funtoo distro, if you need to see all images available, run
lxc image list images:
The container is created, so let’s customize it.
There’s two ways to perform this task: either “externally” by running all the commands from the host shell: lxc exec wslconf -- <command> or, which for this blog we will follow, “internally” by switching to the shell in the container:
# Start a shell inside the containerlxc exec <container name> bash# Check the user logged in > should be rootid# Create a new useruseradd -m -s /bin/bash <username># Change the password for the new userpasswd <username># [Optional] Change the password for the root userpasswd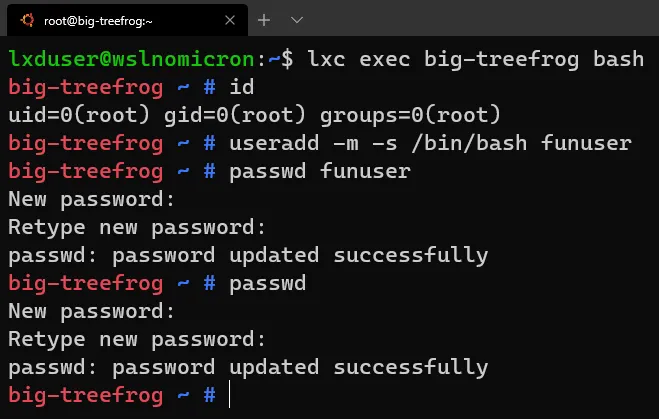
Before we can install new packages, we need to update the list of the repositories (think apt update):
# Check the profile selectedepro show# Update the repositories listego sync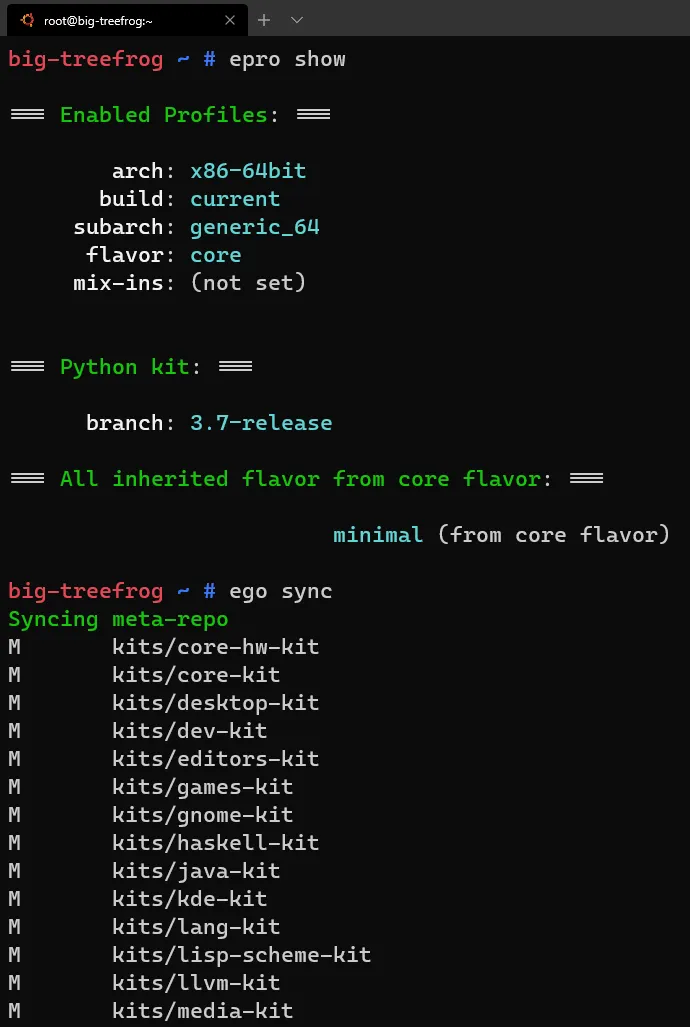
Now that the list of packages is updated, we can install the few packages we need to our initial config:
# Install sudo / fontconfig / daemonize packagesemerge sudo fontconfig sys-apps/daemonize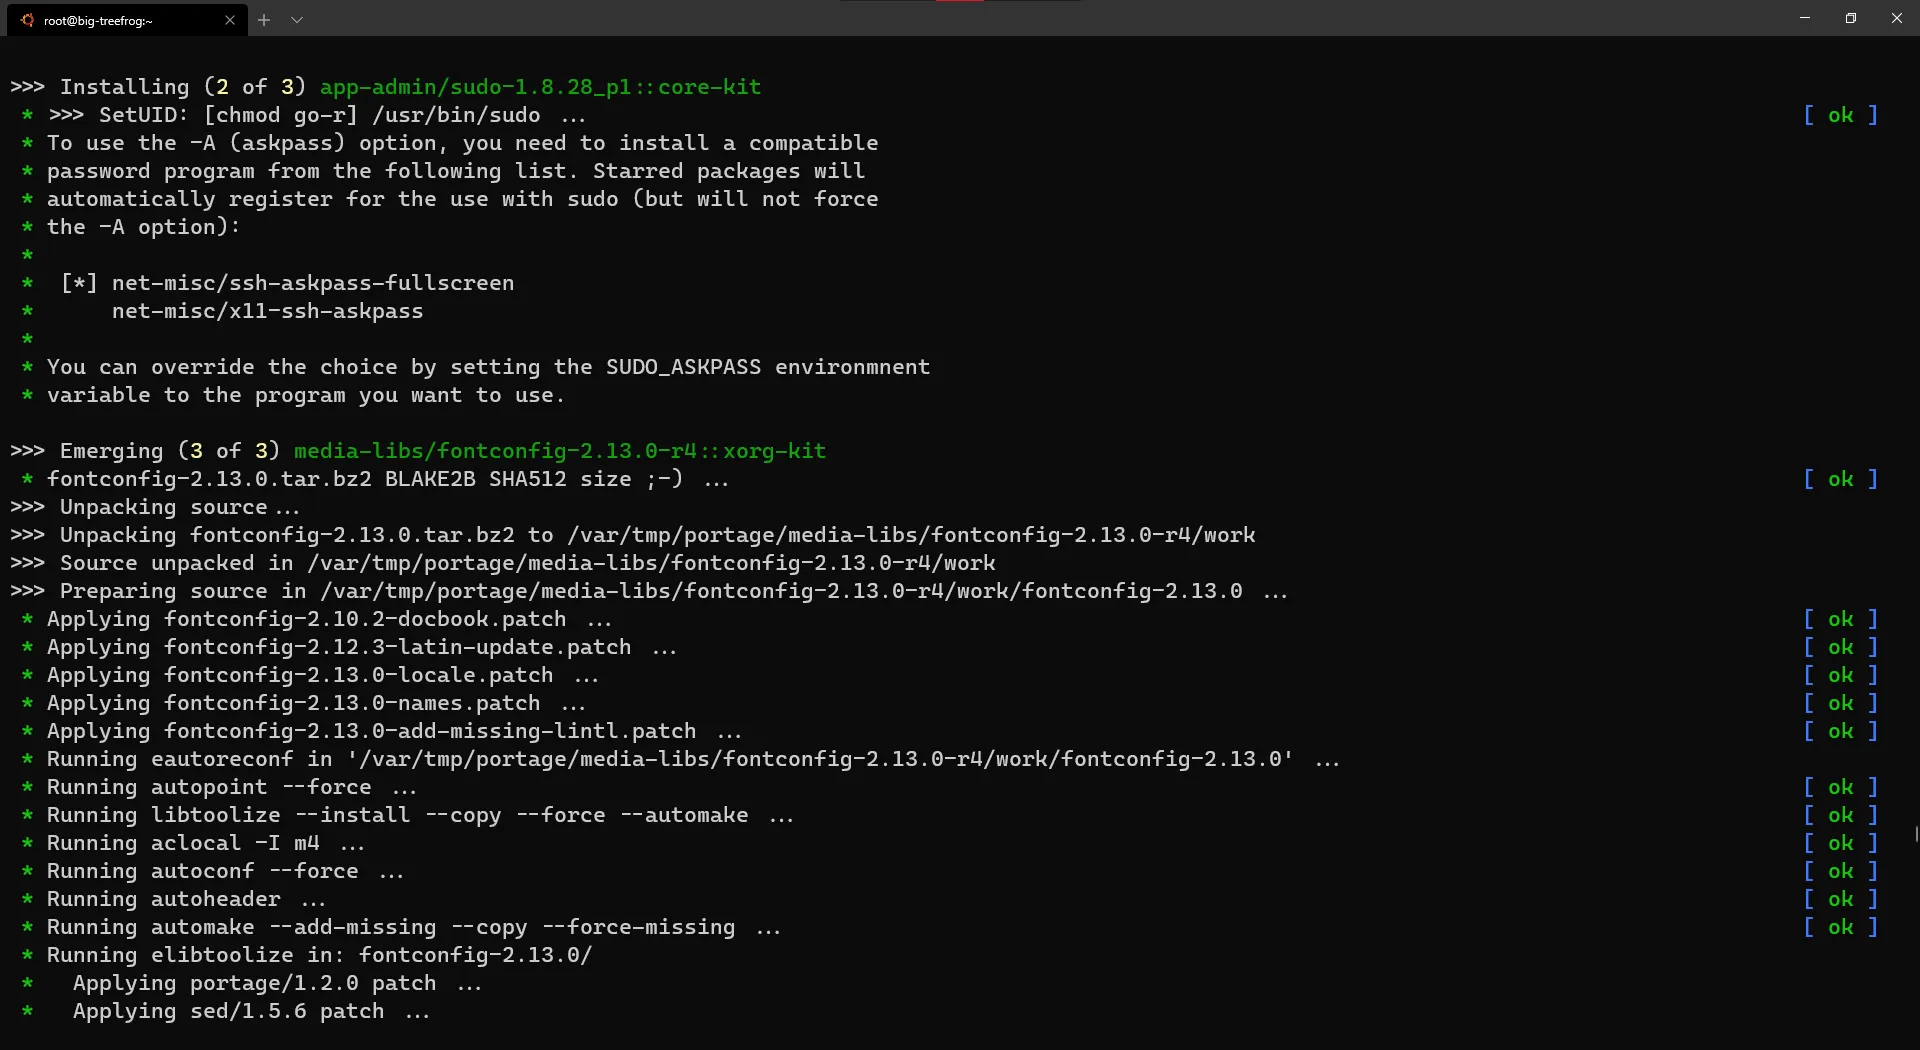
Tip: when trying to install a package that might be present in different repositories, we need to install the “full path”. That’s what we needed to with
daemonizepackage
Finally, let’s add the user to the sudoers:
# Edit the sudoers file and enable the %wheel group (with or without password)visudo# I uncommented the group without password# Add the user to the groupusermod -aG wheel <username>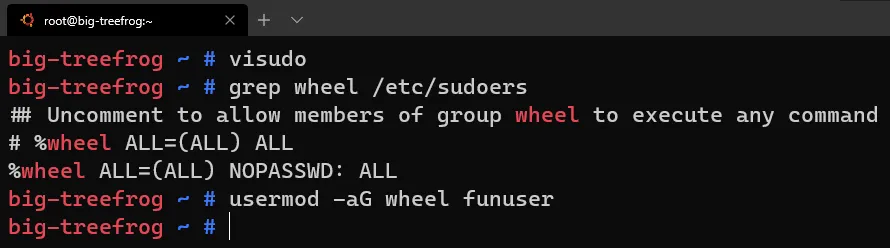
LXC file: adding content to containers
Once everything has been setup inside the container, let’s exit and add additional files:
# Exit the containerexit# Create the wsl.conf file to be copiedvi wsl.conf# Push the file to the containerlxc file push wsl.conf <container name>/etc/wsl.conf# Check if the file has been correctly addedlxc exec <container name> -- ls -l /etc/wsl.conf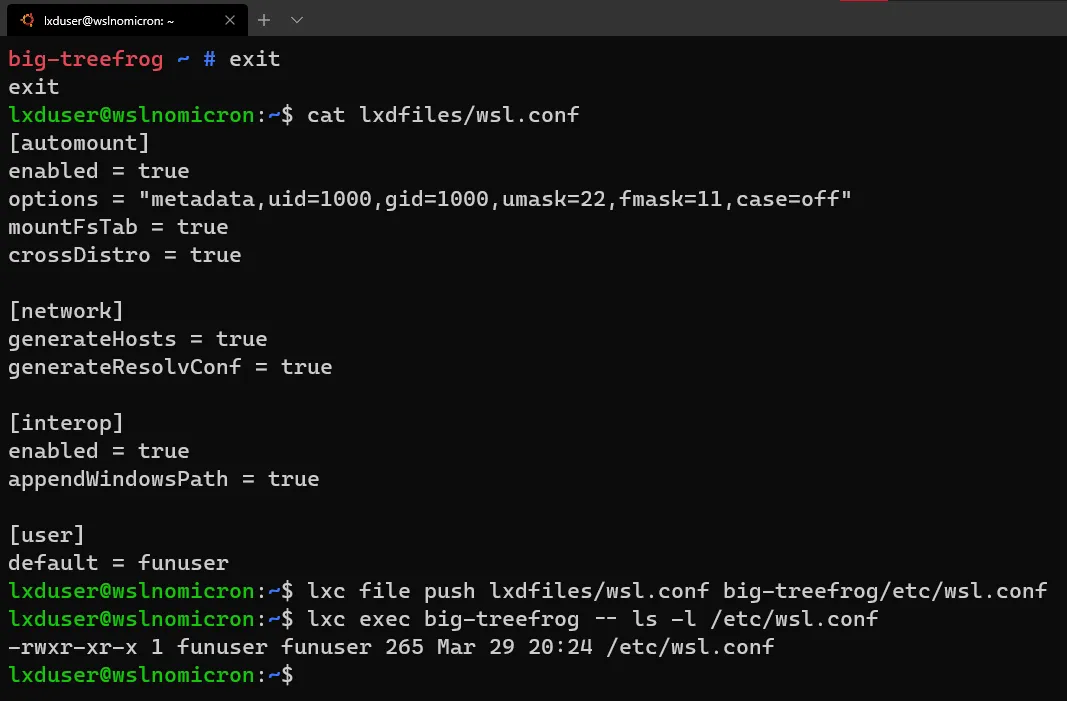
LXC to WSL2: tiny container becomes big distro
With our container fully configured, it’s now time to save our work and import it as a WSL2 distro.
LXD will work like Docker: we need to save the “container state” (read: snapshot) and then save it has a .tar file:
# Save the container statelxc snapshot <container name> <snapshot name># Publish it as a temporary image > this might take some timelxc publish <container name>/<snapshot name> --alias <image name># Check if the image has been correctly createdlxc image list# Export the image to a .tar filelxc image export <image name> .# Check if the image has been correclty exported > the file name is the image ID (hash)ls <image ID>.tar.gz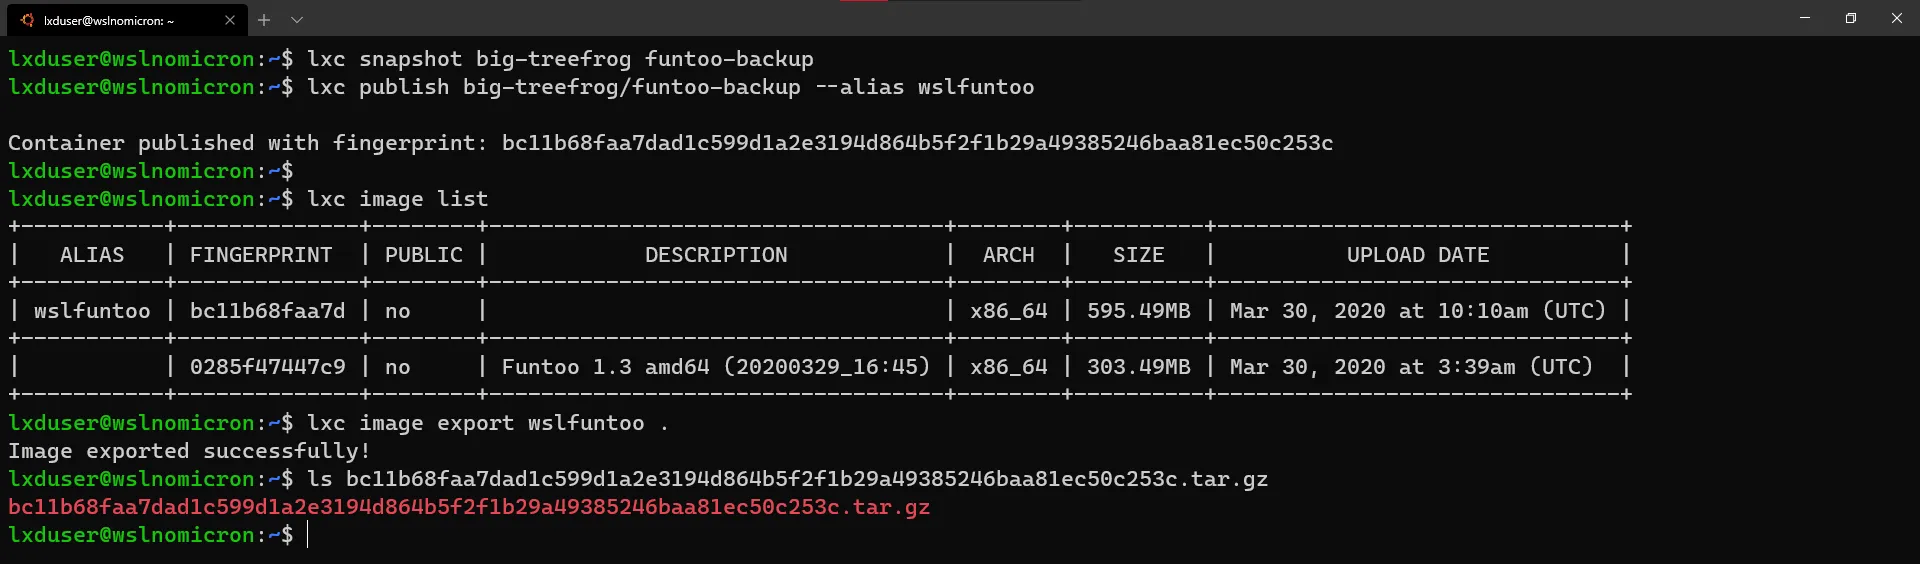
Now, while with Docker we can import directly the exported image, in LXD we need to perform an additional step as the exported image does contain more than just the rootfs:
# Create a temporary directory that will contain the extracted imagemkdir temp# Extract the image to the temporary directory > Important to do it with sudo and the '--same-owner' flagsudo tar -xzf <image id>.tar.gz --same-owner -C temp/# Check the content extractedls temp/# Enter the rootfs directorycd temp/rootfs# Check the content inside the rootfsll# Create a new .tar file with only the rootfs content > Important to do it with sudo and the '--same-owner' flagsudo tar -czf $HOME/<WSL2 distro name>.tar.gz --same-owner *# [Optional] Create a directory for your custom distros and the sources on Windows sidemkdir -p /mnt/c/wsldistros/sources# Copy/move the .tar file to the Windows side > sudo is optionalsudo mv $HOME/<WSL2 distro name>.tar.gz /mnt/c/wsldistros/sources/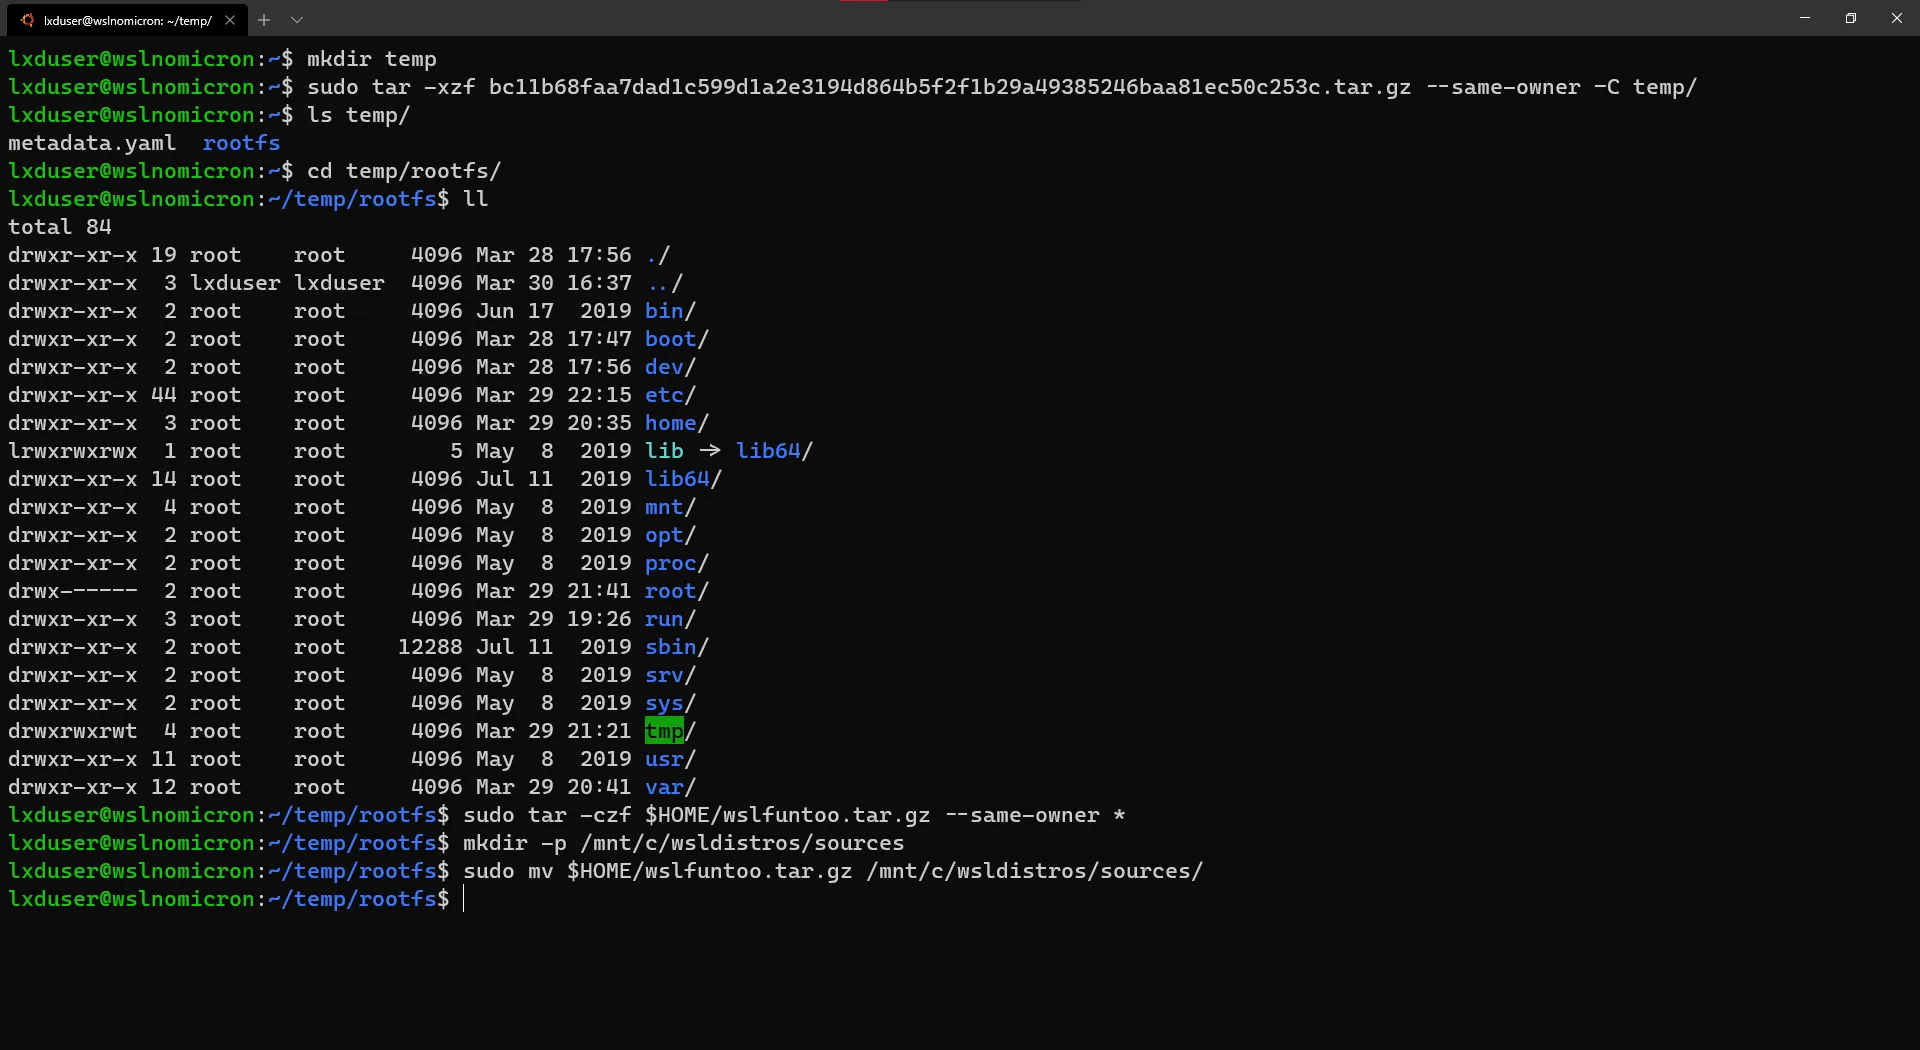
Finally, let’s import the .tar file into WSL2 as our new distro.
Thanks to the interoperability between WSL2 and Windows, we can launch the Windows executables directly from WSL2, so we do not need to launch a Powershell shell to perform the following commands:
# Enter the custom distros directorycd /mnt/c/wsldistros/# Import the .tar file as a WSL2 distro > Just to be sure, I will add the versionwsl.exe --import <WSL2 distro name> ./<WSL2 distro name> ./sources/<WSL2 distro name>.tar.gz --version 2# Login into the new WSL2 distrowsl.exe -d <WSL2 distro name># Enjoy your new distro
Conclusion
While reading through might take some long minutes, the demo lasted 10 minutes with all the loads.
Like stated above, all the configuration steps can be done “externally” and therefore scripted. This would allow to repeat the steps for various distros, the “only gap” would be that the configuration files are not in the same place for the different distros (i.e. the /etc/.bashrc file is, in Funtoo, located in /etc/bash/bashrc).
Concerning LXD, you can/should learn it for what it is and not just stop here. We really only scratched the surface (maybe not even that), and if you are a developer, I strongly encourage you to have a look on this excellent tool created by Monsieur Brian: DevLX
Anyway, have fun and I hope you will enjoy the creation of new distros based on LXD containers.
>>> Nunix out <<<