Incus, Blincus: the dev env magic
Introduction
2023 went by fast, very fast. And while there was no new blog posts in this site, I found out many persons that use this blog to solve potential issues on their daily work.
This means the world to me and therefore I can already tell you that 2024 will have at least 1 blog per month!
And I can already tell you that the January one will be a first: a reader sent me some details about a test and asked if I could blog about after testing it. It’s network related and about a real world use case, so stay tuned!
With all that said, let’s focus on the topic we’re all here for, the latest great project from my friend and the Owner of wsl.dev: Brian Ketelsen. Let me introduce Blincus.
Prerequisites
Here’s the list of components I used for this blog post:
-
OS: Windows 11 Professional version 23H2 - channel: General Availability / build: 22631
-
WSL version: 2.0.14.0 (pre-release)
-
WSL kernel: 5.15.133
-
WSL2 distro: Ubuntu 22.04
-
Debian can also be a choice here.
-
Since WSL v0.67.6, systemD can be enabled in
/etc/wsl.conf -
The distro hostname is set in
/etc/wsl.conf -
cgroup2is activated in$env:USERPROFILE\.wslconfig-
Terminal window [wsl2]kernelCommandLine = cgroup_no_v1=all systemd.unified_cgroup_hierarchy=1
-
-
-
[Optional] Terminal: Windows Terminal
- Version: 1.18.3181.0
Spell 1: Incus
Like every wizard, before you cast the biggest and coolest spell (i.e. Patronus), you need to know your basic spells.
In this case, the first spell to learn is Incus, a fork of LXD. If you want to know more about this fork and why it exists, you can read the initial announcement from the maintainers.
Installation
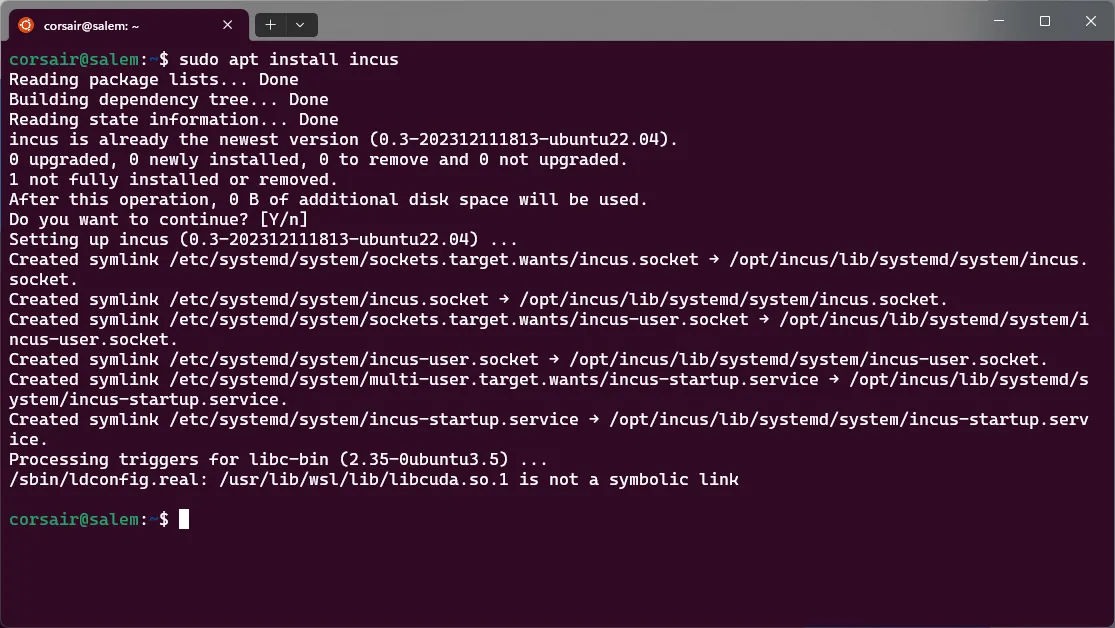
The first task will be to install Incus on the WSL distro.
While Incus can be installed from source, the most comfortable way will be to use the available Debian or Ubuntu packages provided by Zabbly.
The full installation steps are described at https://github.com/zabbly/incus and it’s strongly recommended you follow them.
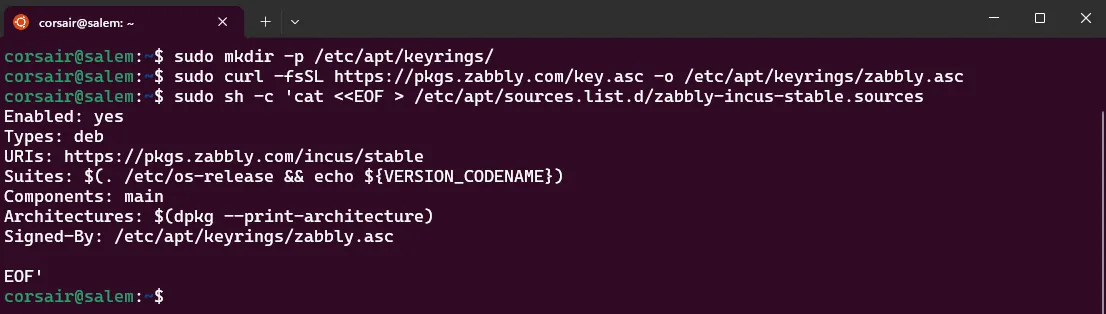
Here’s the short version without much details. Again, go read the initial steps, and while there give it a star:
# Add repo keysudo mkdir -p /etc/apt/keyrings/sudo curl -fsSL https://pkgs.zabbly.com/key.asc -o /etc/apt/keyrings/zabbly.asc
# Add repo datasudo sh -c 'cat <<EOF > /etc/apt/sources.list.d/zabbly-incus-stable.sourcesEnabled: yesTypes: debURIs: https://pkgs.zabbly.com/incus/stableSuites: $(. /etc/os-release && echo ${VERSION_CODENAME})Components: mainArchitectures: $(dpkg --print-architecture)Signed-By: /etc/apt/keyrings/zabbly.asc
EOF'
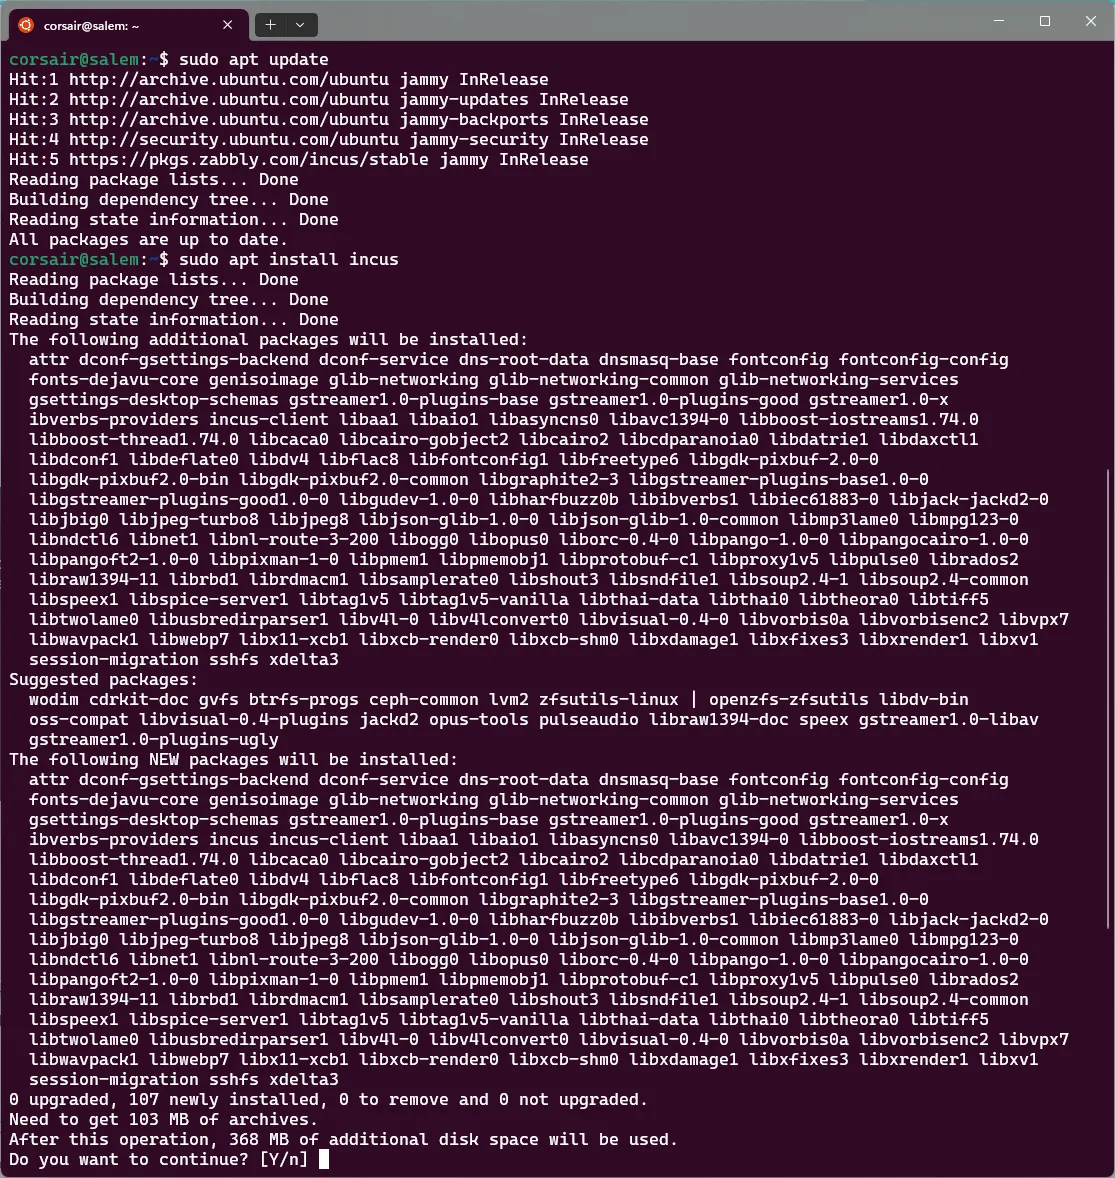
# Refresh the repo list and install Incussudo apt updatesudo apt install incusNOTE: if you end up with the error
E: Sub-process /usr/bin/dpkg returned an error code (1)this might mean systemd is not enabled. Enable it in/etc/wsl.conf, stop the instance withwsl --terminatefrom powershell and run again the install commandsudo apt install incus
Configuration
Once the installation completed, before you can use Incus, you’ll need to perform some configuration.
Once again, it’s strongly recommended you read the original docs to understand the reason behind the following steps:
# Add your user to the incus-admin groupsudo adduser $USER incus-admin
# Exit your session and start a new one
# Initialize Incusincus admin init --minimal
# Check the Incus version, the server and client should be the sameincus version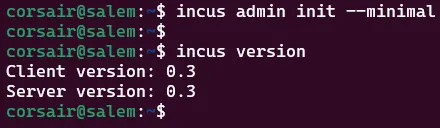
First instance
With the configuration done, you can now run your first instance:
# Launch a containerincus launch images:ubuntu/22.04 mycontainer
# Do a quick test. Example: update the repos, this will show if you have networkincus exec mycontainer apt update
# [Optional] Delete the container once no more neededincus rm --force mycontainer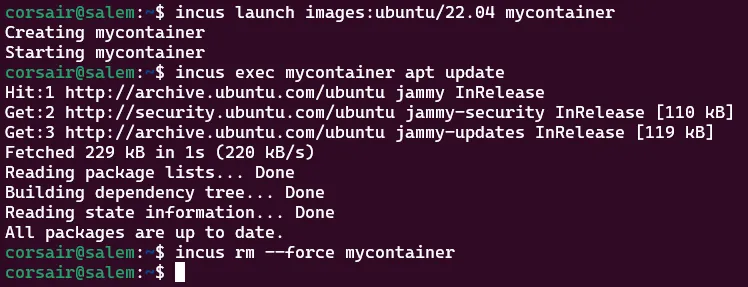
Spell acquired
Congrats, you just learnt the first spell! If you need or want to discover a bit more about Incus, now it’s a good time. Try to have a look on the container created, see what user is logged in, do you see any host data/moutpoints?
Getting a feeling of what you have and the potential limitations for your workflow is exactly what will make you appreciate even more the next spell: Blincus!
Spell 2: Blincus
If you reached this part, then congrats on learning the first spell, as this second spell is a continuation of the first one and makes it even more powerful.
This second spell has been created by one of the best wizards alive: Monsieur Brian.
Like the first spell, you are strongly encouraged to go check the original grimoire to learn how to master this spell, as you’ll find only a glimpse in this page.
Ready?
Installation
Blincus can be installed in different ways and with a set of options that you can use depending on your needs. You can find all the needed documentation in the installation page.
Here, you’ll install the latest release in the standard way, without any options:
# Install Blincuscurl -s https://raw.githubusercontent.com/ublue-os/blincus/main/install | sh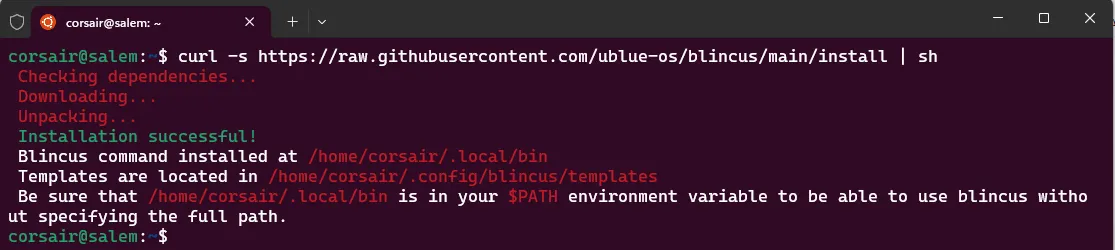
And to avoid you the “surprise” to find later something is missing, the WSL Ubuntu distro misses a package for launching Blincus graphical instances:
# Search the package containing `xhost`apt search xhost
# Install the package containing `xhost`sudo apt install -y x11-xserver-utils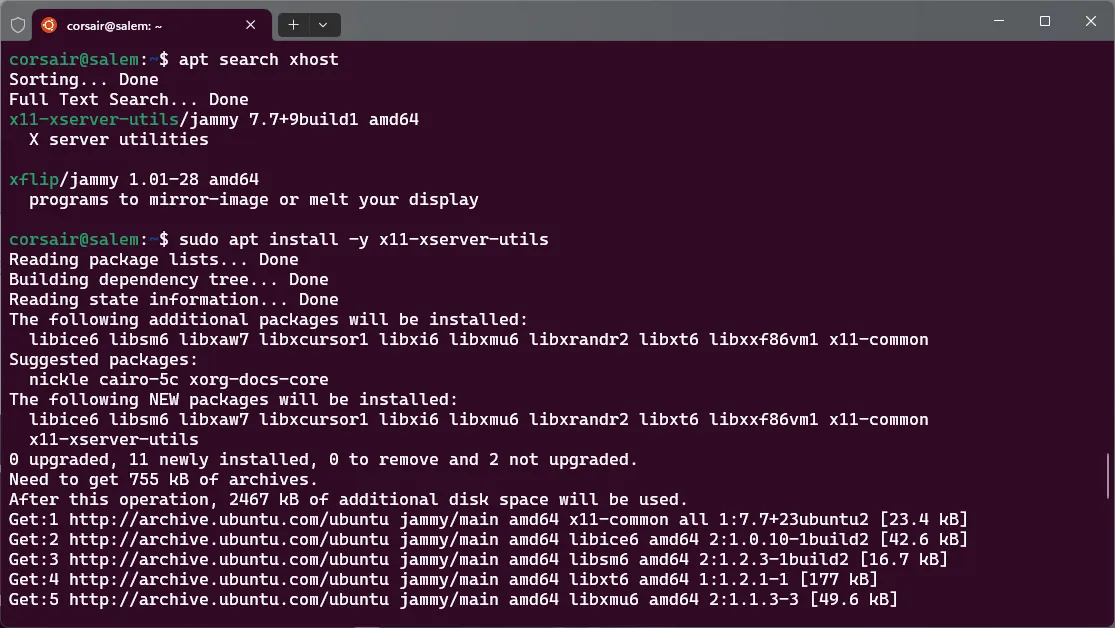
Configuration
Before you can use Blincus, you’ll need to apply the following configuration:
# [Optional] As shown in the install output, add $HOME/.local/bin to your PATHprintf '\n# Blincus\nexport PATH=$PATH:$HOME/.local/bin\n' >> .bashrc
## Check if it has been added correctlytail $HOME/.bashrc
## Reload the .bashrc filesource .bashrc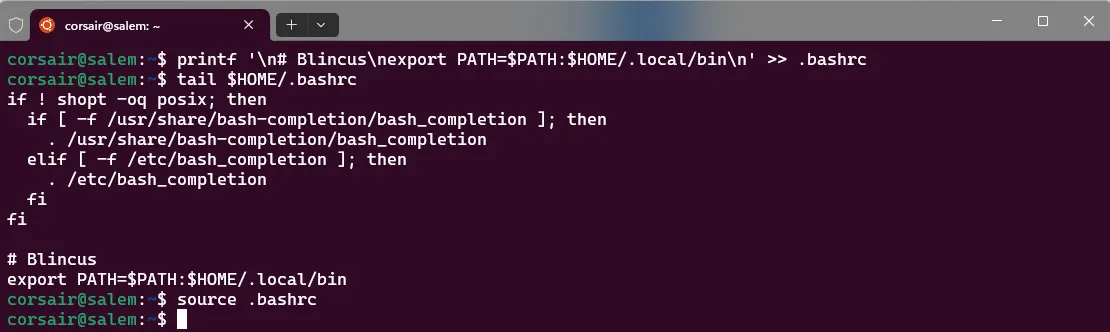
Once Blincus is on your PATH variable, you can try to run it and you’ll be welcomed with an error message!
The output is self-explanatory, however it only reflects half of what needs to be done. To have the full picture, you can see the post-install documentation:
# Run Blincus without any argumentblincus
# Add the ID mappingsecho "root:1000000:1000000000" | sudo tee -a /etc/subuid /etc/subgidecho "root:1000:1" | sudo tee -a /etc/subuid /etc/subgid
# Run Blincus without any argumentblincus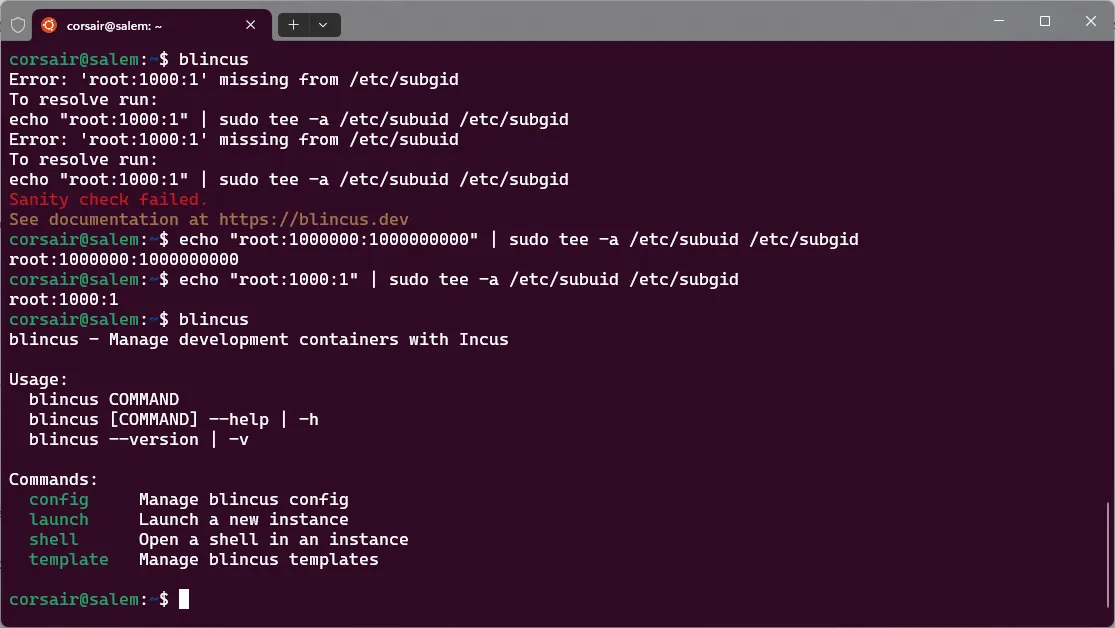
First instance
With all the configuration done, you can now start your first Blincus instance:
# List the Blincus templatesblincus template list
# Launch the first instance. In this example, Ubuntu with X sharing is selectedblincus launch --template ubuntux myubuntu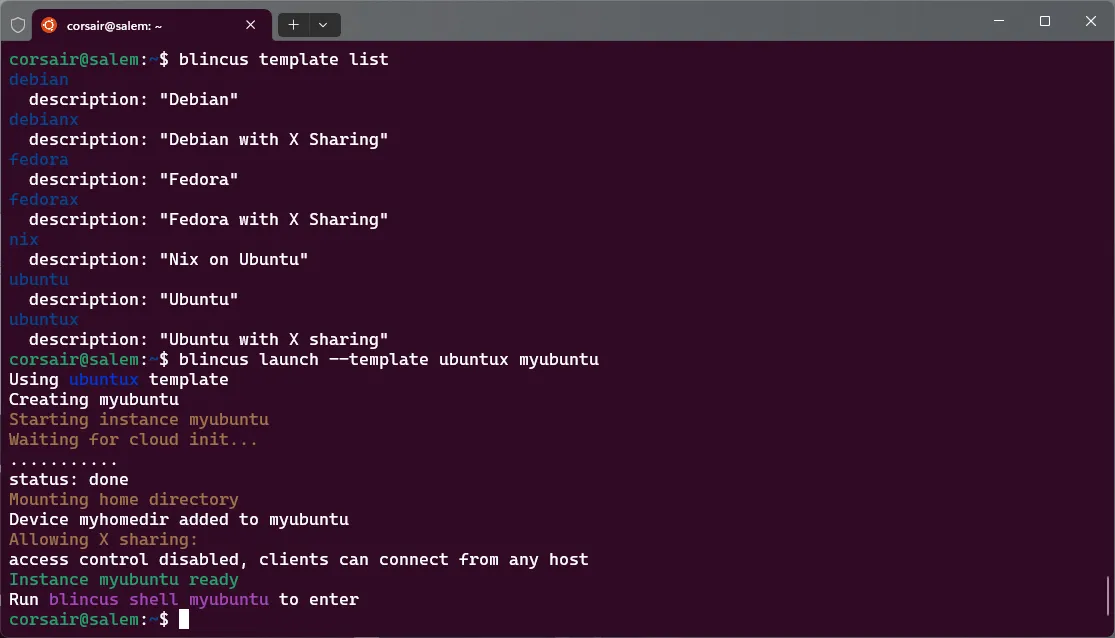
At the end of the instance creation, you can see the command to enter your newly created instance. However, on WSL, this will end with an error stating your user doesn’t exist inside the instance.
This is due to a field inside the cloud init template file not being interpreted correctly. Luckily for you, here’s the solution:
# List the Blincus instancesblincus list
# Try to shell in to your created instance## This will generate an errorblincus shell myubuntu
# Check for the 'gecos' field inside the cloud init template filesgrep gecos $HOME/.config/blincus/templates/*
# Comment the gecos line in the cloud init template filessed -i 's/gecos/#gecos/g' $HOME/.config/blincus/templates/*
# Check if the 'gecos' field is correctly commentedgrep gecos $HOME/.config/blincus/templates/*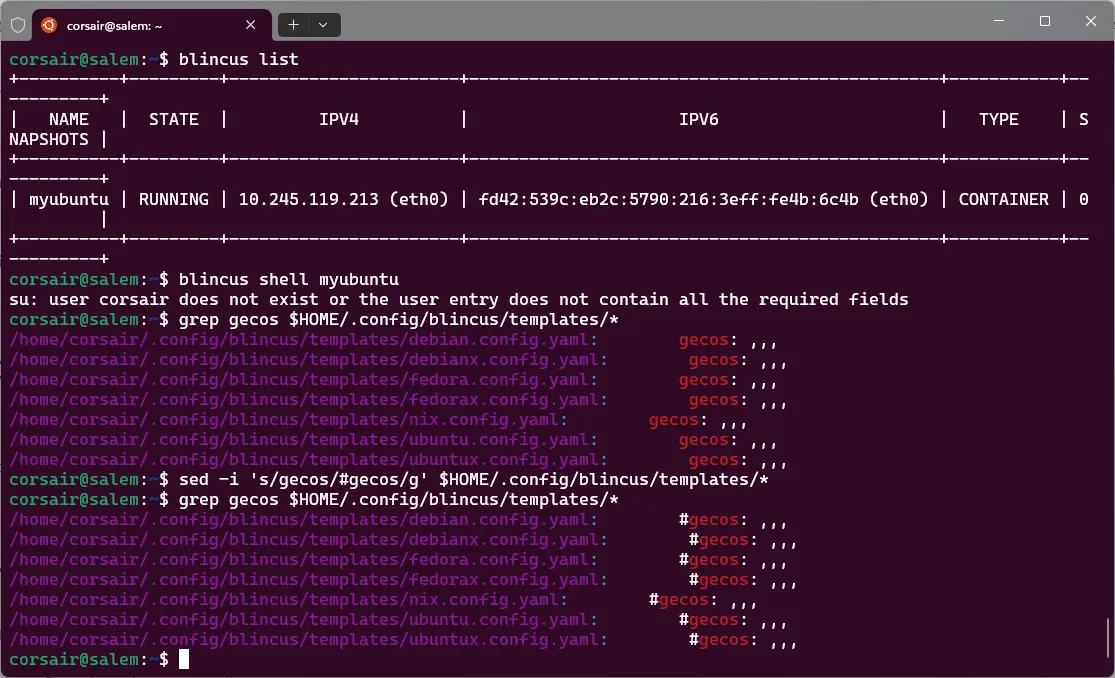
With the cloud init template files “patched”, you can create a new instance:
# Delete the previous instanceblincus rm --force myubuntu
# Check if the instance has been correctly deletedblincus list
# Launch a new instance with the same template## You should see that the cloud init stage takes more timeblincus launch --template ubuntux myubuntu
# Shell in to your created instanceblincus shell myubuntu
[Optional] See the power
If you followed along and picked a graphical template, such as ubuntux, then you can launch a graphical app and it will be displayed by WSLg:
# Install a graphical app. In this example, the package containing xeyes is selectedsudo apt install -y x11-apps
# Launch a graphical app. In this example, xeyesxeyes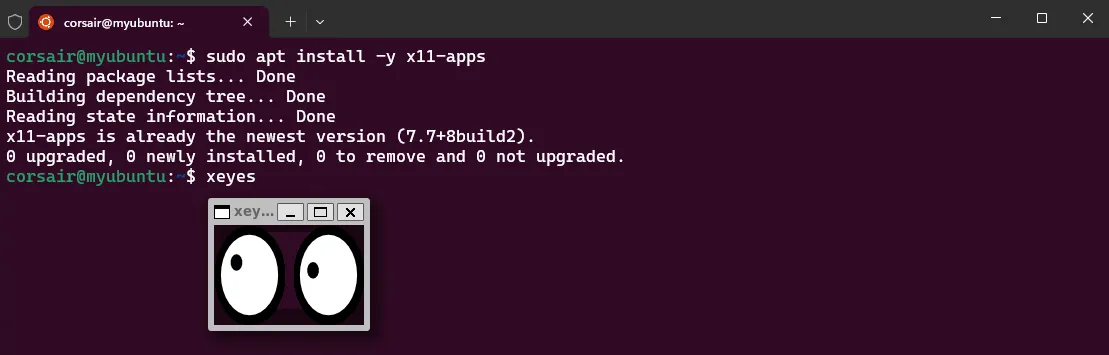
[Optional] Hear the power
And if you want to really impress your friends, sound is also enabled via pulseaudio and you can play with something fun:
# Install a text-to-speach app. In this example, espeak is selectedsudo apt install espeak
# Test the soundespeak "Brian Ketelsen and the whole Incus team are the real stars of this show"
Conclusion
As stated in the introduction, this is really just a glimpse of what both Incus and Blincus can do!
On the backend side, Incus can do so much more than just create containers and you should really check the capabilities as it might help you in several occasions.
On the frontend side, Blincus provides a series of templates and more importantly, a customization that makes you feel like home. Yes, it’s very opiniated, and if you know cloud-init, or learn it by copying one existing template, then you can “make it yours” even more.
Hope you enjoyed this short wizardry and if you reached this far, then I thank you very much and wish you a Merry Christmas and Happy New Year!
See you in 2024.
>>> Nunix out <<<